Recorded Calls |
Using the Phone to Record Calls You can record your outbound calls and calls that are forwarded to you from your iTeleCenter. To record a call: ● After you are connected to the other party on the call, press *7 on your phone to begin recording. ● A message will play that states, “This call is now being recorded.” ● Press *7 on your phone again to stop recording. NOTE: You can do multiple recordings in a single call. |
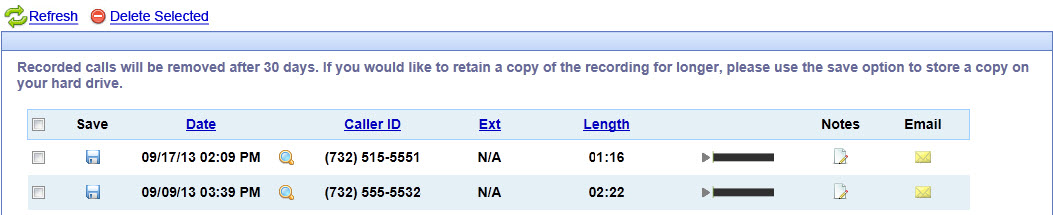
● Checkbox - allows you to select the recording to delete. Check the top checkbox (above the messages) to select all the recordings.
● Save (button) - Click this button to save a recorded call as an audio file to your local computer.
● Date - displays the date and time for the recorded call.
● Phone Match (button) - Click this button to open a window with contact information for the phone number (if available). Caller ID (hyperlink) - displays the number the recorded call is from. Click the hyperlink to listen to the recorded call.
● Extension - displays the extension the call was forwarded from (if the caller was on an extension when the call was forwarded).
● Length - displays how long the recorded call is.
● Play (button) - Click the button to listen to the recorded call.
● Email (hyperlink) – Click the Email link to send an email with a URL/link that allows the email recipient to listen to the recorded call.
● Refresh - gets your latest recorded calls.
● Delete Selected – permanently deletes the selected recorded calls.